Crystal CRM has the ability to import/capture leads from the most popular contact form (and any other customizable forms) for WordPress Contact Form 7 together with the Email Integration feature which is built in Crystal CRM.
The process is very easy, once you configure the contact form to be compatible with the email integration, you will import leads in no time with the fields filled in contact form automatically added for the imported lead.
We recommend you first to read this whole setup article to get the idea how the contact form fields will be mapped and how the leads will be imported in Crystal CRM to get familiar with the steps you need to perform in order to make this config working, then you can move on to configure the full setup.
Prerequisite for this setup is to have previously configured properly working lead email integration in Crystal CRM, click here to read more how to configure.
For the simplicity of this example and setup, we will use a minimal example for Contact Form config with fields Name, Email, Message (see below for more detailed example).
Install Contact Form 7
If you already have Contact Form 7 installed and you are familiar with Contact Corm 7 you can skip this step.
If you haven’t already installed Contact Form 7, you must install the plugin from your WordPress dashboard area, from the left menu navigate to Plugins->Add New and search for Contact Form 7, after you find the Contact Form 7 plugin click on Install and after installation click on Activate.
We assume that you are already familiar how Contact Form 7 works and how you can embed the form into custom page eq. Contact Us, in case you are not, you can read more by clicking here.
Configure Contact Form 7
In this example, we will use the basic Contact Form 7 config which comes with the form after installation.
After you install and activate the plugin from the WordPress admin menu click on Contact->Contact Forms
Chose the form you want to configure and click on the name.
Click on the Mail tab in the contact form to configure the contact form email to be compatible with Crystal CRM.
It’s highly recommended always to include the email field in the message
Additional Headers
Add your Crystal CRM integration email configured in Setup->Leads->Email Integration. In new line add eq. Bcc: yourleadsintegrationemail@example.com
This is the important part, in this case when a user fills out the form, the contact form plugin will add BCC your leads email integration email and the Crystal CRM CRON job will be able to catch this email and import the lead with the provided fields.
Message Body
The point here is to wrap all form values and include in the email message/body with:
<div id="field_LEAD_FIELD">[your-CONTACT-FORM-FIELD]</div>
After the email is sent this field will be populated with the actual field value and will become eq.
<div id="field_LEAD_FIELD">John Doe</div>
You will need to replace LEAD_FIELD with the actual lead field.
You will need actually to create contact form field in order to add the fields in the email body.
Use HTML content type
In Contact Form 7 mail tab check Use HTML Content Type, in this case, the email will be HTML.
Available lead fields
field_name
field_title
field_email
field_website
field_phonenumber
field_company
field_description
field_address
field_city
field_state
field_country
field_zip
field_lead_value (v2.5.0)
Country Field
If you are passing a country field, keep in mind that the country must be ID from Crystal CRM database table for countries (tblcountries) or the name Eq. United States (without typos) because Crystal CRM script will compare the country name passed in the message body and find suitable country id from Crystal CRM countries table.
Eq user writes United States, this will work fine, but if a user writes a country name that does not exist in countries table or makes a typo eq. Untited States, Crystal CRM won’t be able to identify the ID of the country from countries table.
Custom Fields
In case you want to integrate custom field for a lead, you can use custom_field_ID, Replace the ID with the actual custom field ID which can be found in Setup->Custom Fields.
If you use custom field the email message markup should look like this:
<div id="custom_field_ID">[your-CONTACT-FORM-FIELD]</div>
Note that if you are adding custom fields of type Checkbox or Select, the options must be the same like the one you added in Crystal CRM custom field option in Setup->Custom Fields. Also for dates fields, the dates custom fields must be passed in Y-m-d format.
Eq. example for a custom field of type Select in Crystal CRM – Click here to see the options config.
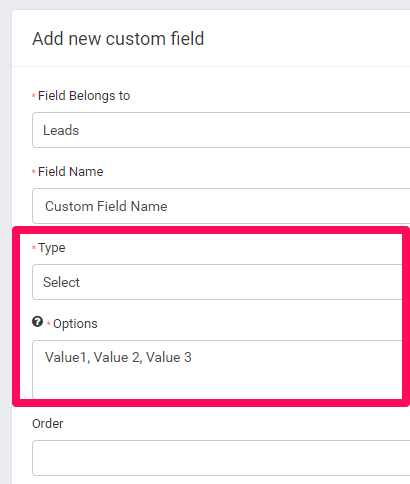
Eq. example for a custom field of type Select in Contact Form 7 – Click here to see options config.
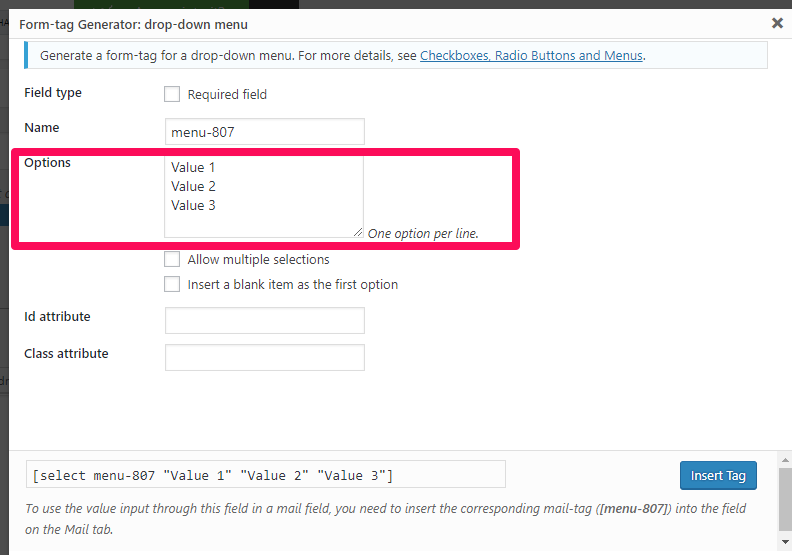
Attachments
In the Mail Tab in Contact Form 7 simply add the field tag in the File Attachments Area.
Keep in mind that only attachment extensions allowed in Setup->Settings->General (Crystal CRM installation) will be added while importing the lead.
Full example with more fields
Let’s say our Contact Form 7 have fields:
- Subject
- Name
- Website
- Phone number
- Company
- Message
Contact Form Fields
Our contact form fields config should look like this (you can format it however you like):
<label> Subject
[text* your-subject] </label>
<label> Your Name (required)
[text* your-name] </label>
<label> Your Email (required)
[email* your-email] </label>
<label> Website
[text your-website] </label>
<label> Phone Number
[text your-phonenumber] </label>
<label> Company
[text your-company] </label>
<label> Your Message
[textarea your-message] </label>
[submit "Send"]
Mail Tab Config
Click on the mail tab to configure the email body content.
You can get the available shortcodes of the field values at the top of the Mail Tab Config where it says “In the following fields, you can use these mail-tags”
The email body content should look like this:
From: [your-name] <[your-email]>
Subject: [your-subject]
Name:
<div id="field_name">[your-name]</div>
Email:
<div id="field_email">[your-email]</div>
Website:
<div id="field_website">[your-website]</div>
Phone Number:
<div id="field_phonenumber">[your-phonenumber]</div>
Company:
<div id="field_company">[your-company]</div>
Message Body:
<div id="field_description">[your-message]</div>
--
This e-mail was sent from a contact form on Crystal CRM (https://help.crystalcrm.com)
You can see how all field values are wrapped within div with id=”field_LEAD_FIELD”, the LEAD_FIELD is actually from the available lead fields
In this example the message that user will write in the contact form we are populating the lead description text area, which is suitable for this case.
Keep in mind that the subject won’t be added to the leads section of Crystal CRM because the subject is not suitable for any field that belongs to lead, you can either create custom field or you will be able to view the subject by clicking on the Email Activity tab in the lead modal, click here to check how this will look.
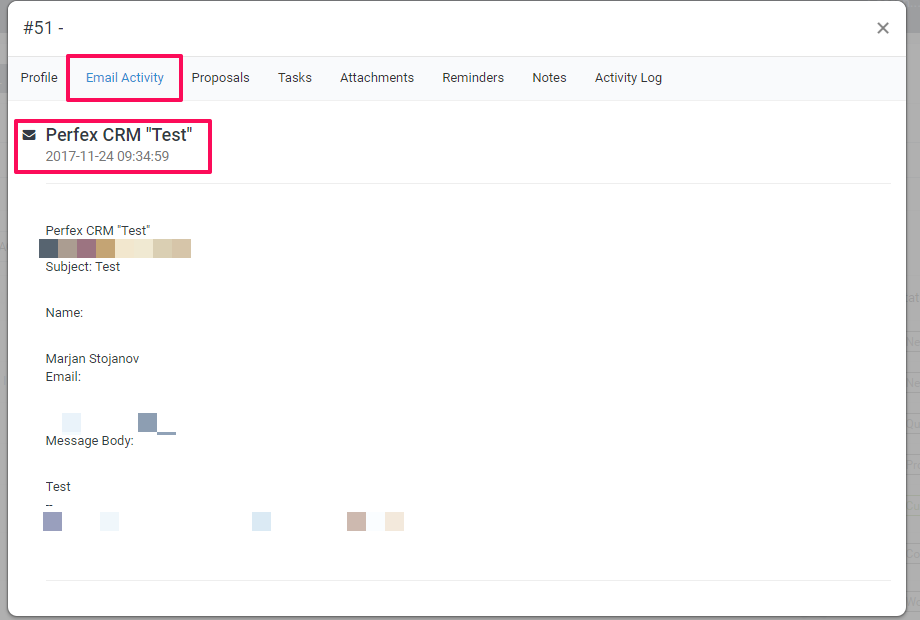
Now when a user fills Contact Form 7 the plugin will add your email integration email as BCC header and this email will be sent too to the email integration email.
The Crystal CRM cron job will read this email and map all fields provided within the email message and import the lead in Crystal CRM leads section.